
I have some experience with dyeing clothing from when I worked in a theatrical costume shop for a few years. These costumes were dyed in an old washing machine drum that we used exclusively for fabric dyeing, and the dyes we used were packaged Rit, Dylon, or other purchased powders and liquids in bright vibrant, chemically-produced colours. It was fairly consistent, didn’t require mordants or scouring, always resulted in dramatic transformations, and was never too messy since we could just run a rinse cycle on the washing machine to rinse out any excess dye. Basically, it was a perfect solution for the always slightly-rushed production schedule of a costume shop.
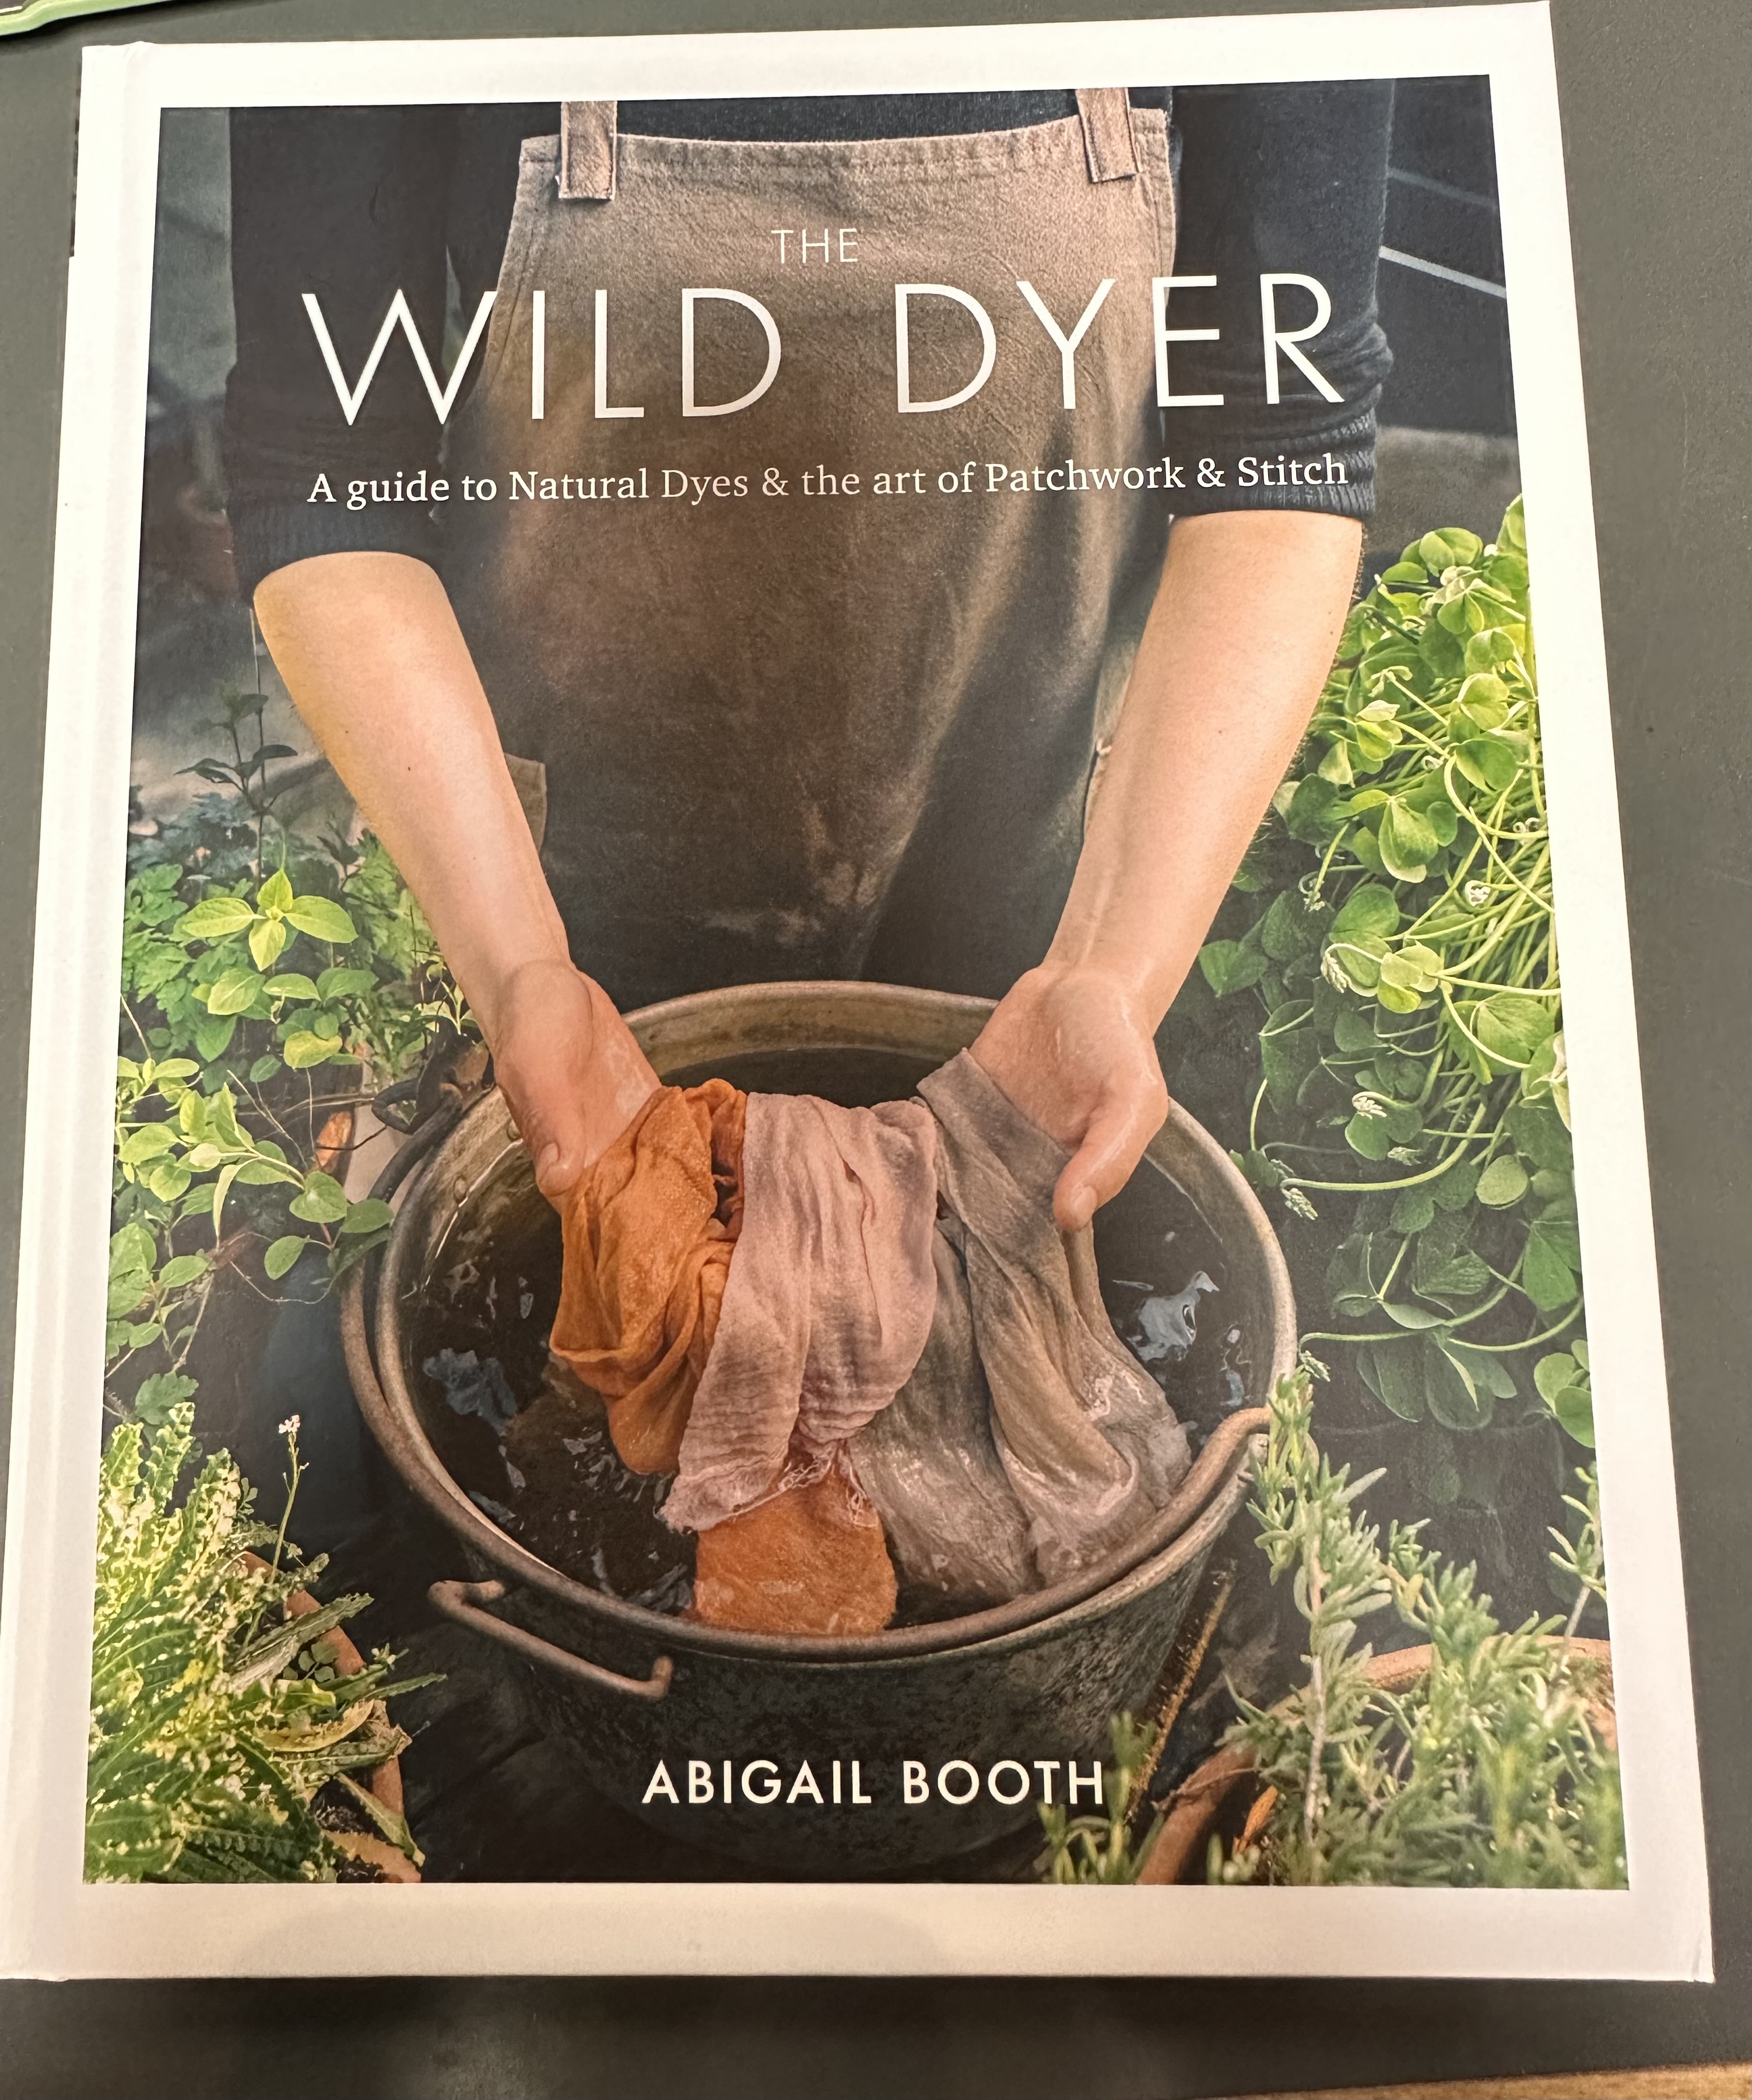
I haven’t worked in that costume shop for nearly a decade, but lately I’ve found myself drawn to the magic of dyeing textiles again. I found a book, ‘The Wild Dyer: A guide to Natural Dyes & the art of Patchwork & Stitch’ by Abigail Booth, in a London shop last year during a visit, and was immediately intrigued by the idea of using foraged plants and kitchen waste to produce dye vats. The swatches in the book show colours that feel natural, you know? They are soft and complex, and look like they belong together.
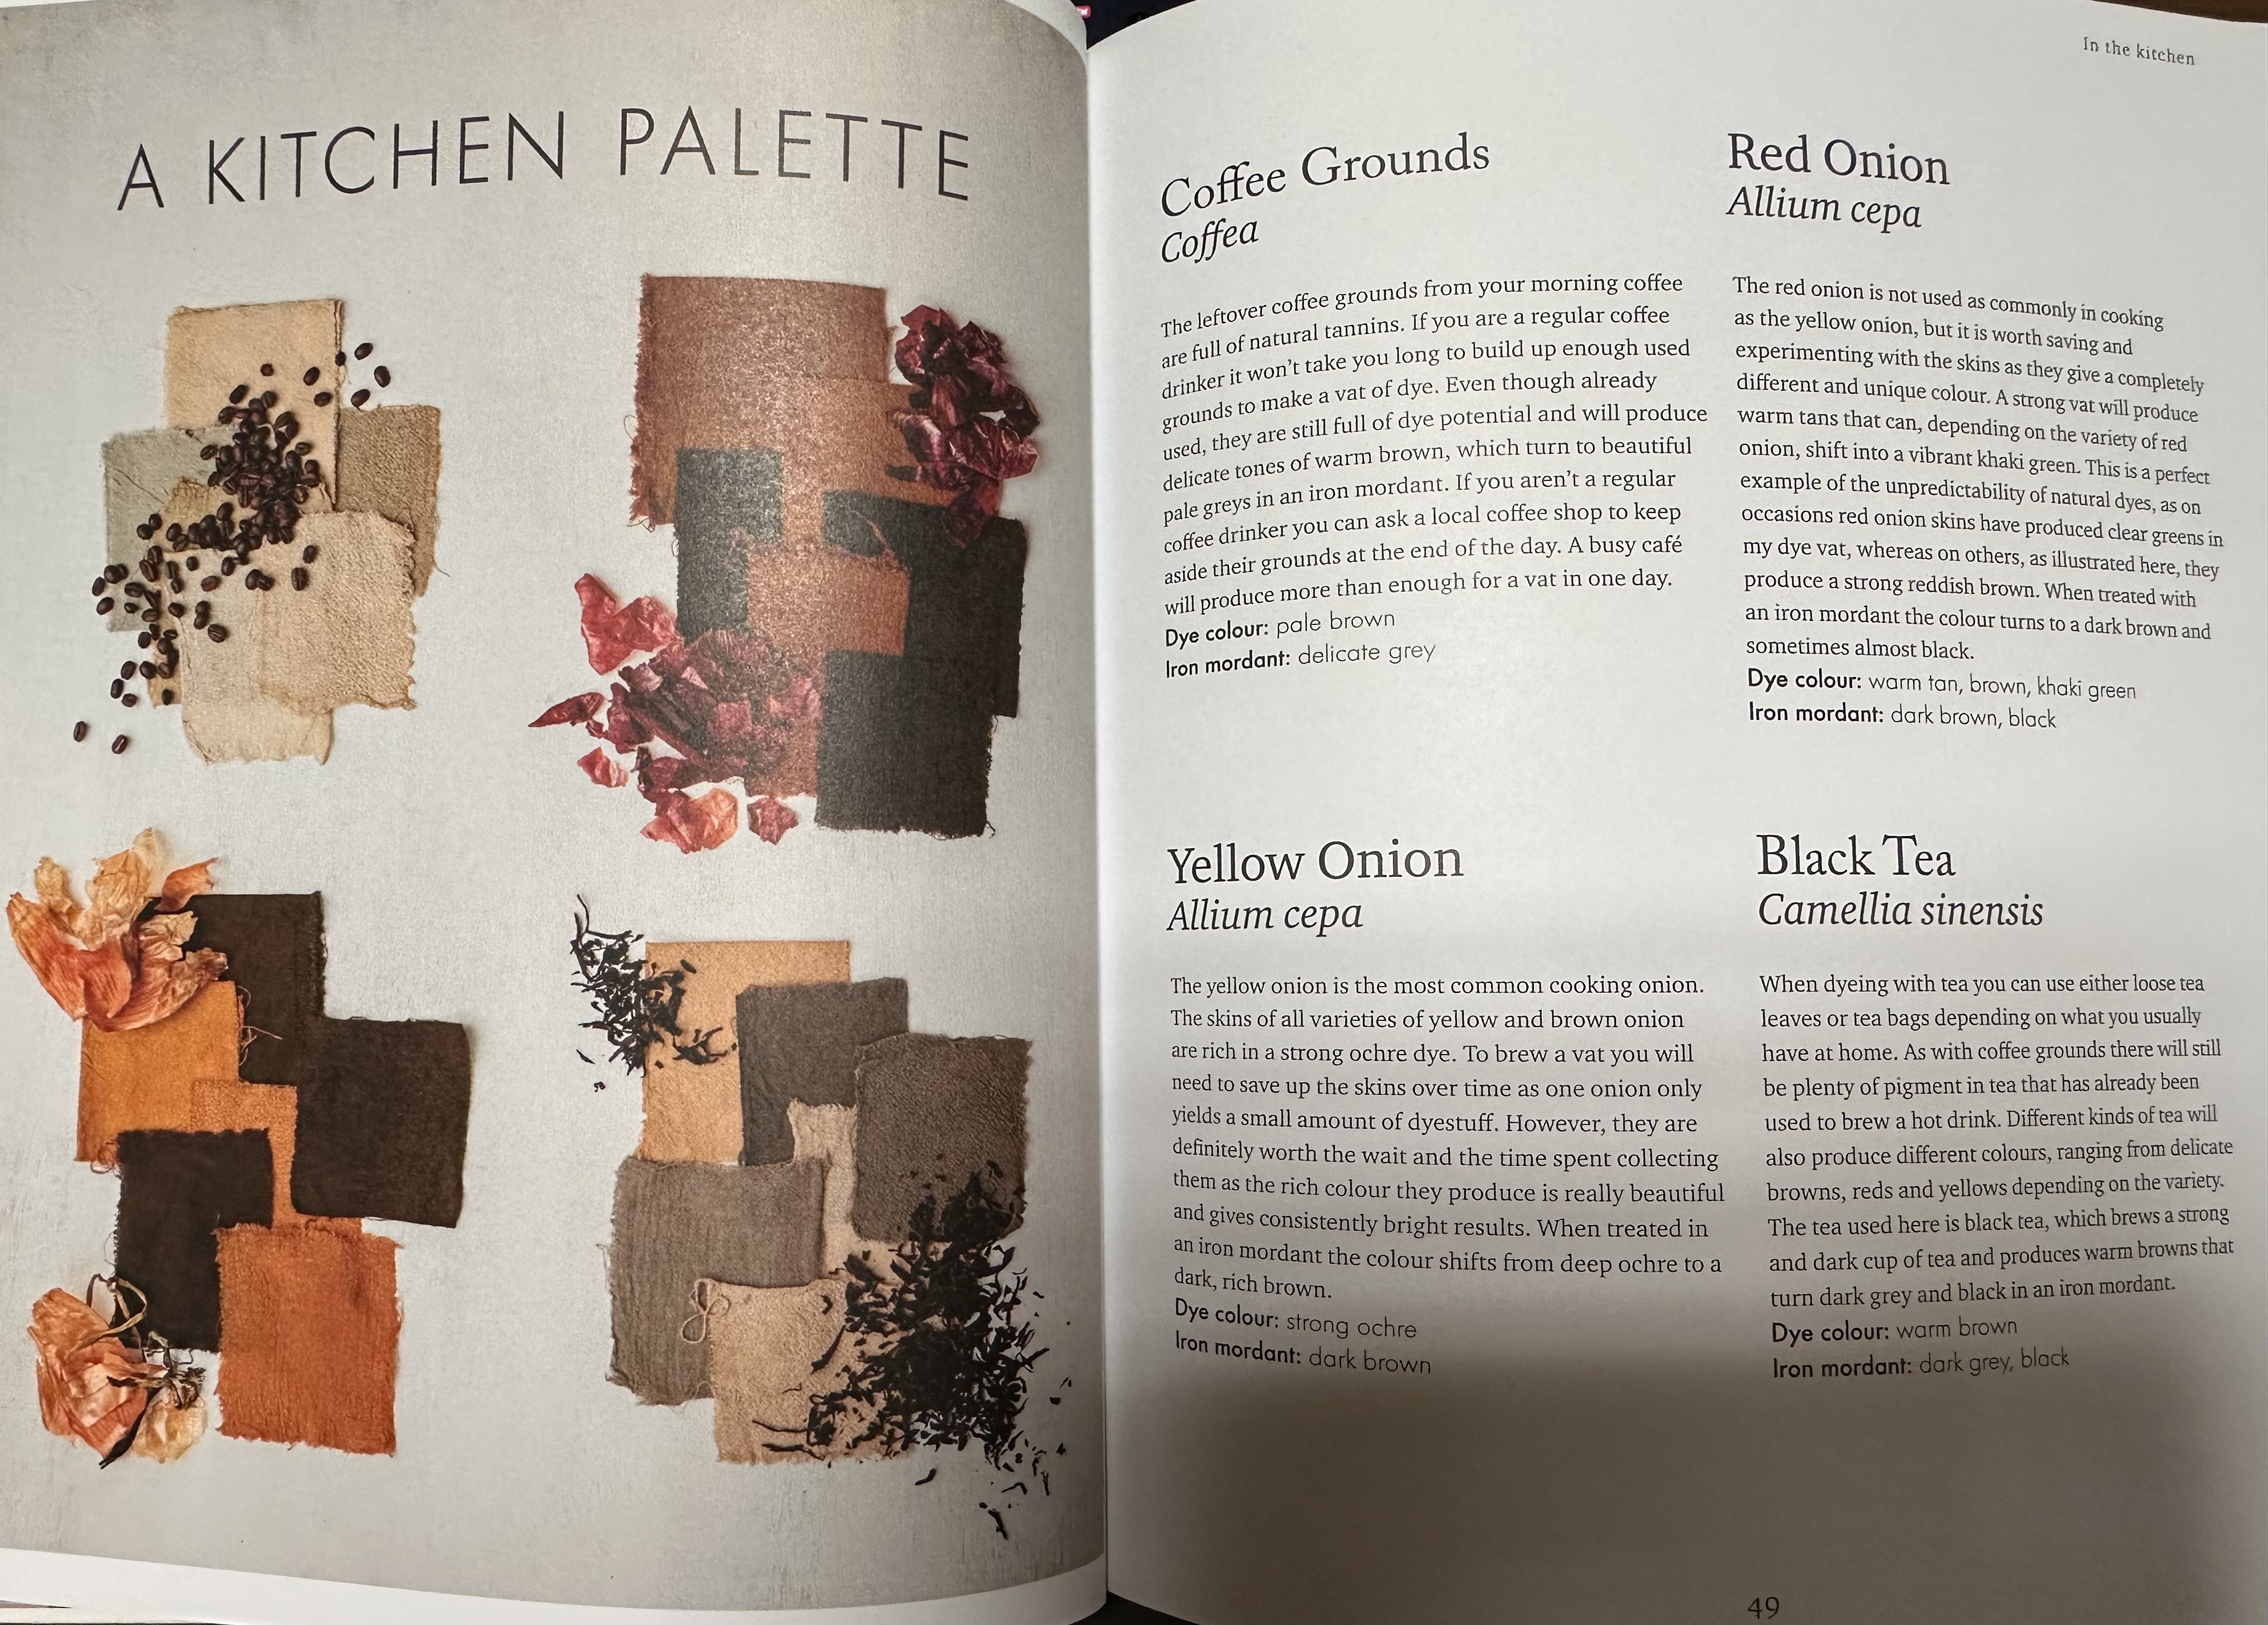
Every page of this book invites you to raid your compost bin to create vats of colour. It gives a brief introduction to scouring and mordanting, and then basically says ‘toss those scraps in a pot of water and let’s see what happens!’ Ok, I’m exaggerating here. But really, there is little consideration given to how the colours will fade over time and with multiple washes, or how to achieve consistent colours each time you produce a dye vat, or even what quantity of dye stuff you should use in each pot. The author really emphases how this is a natural process and how you should go with the flow to see what results you can achieve. She even suggests keeping spent dye stuff to add to your next vat for colour complexity.
Amazing, right? I want to agree with her; I wish I was this free!
Now, just for complete transparency: I’m not this free. I went to engineering school before I changed my mind and became a costume designer, and that instilled in me some kind of deep desire for clearly-written, easy to follow, reproducible instructions. I want measurements. I want quantities. I want specific times.
HOWEVER, I loved the results the author got in her book; I wanted little collections of linen swatches in various shades of beige and pale greens. So, I decided I would give it a try and see what happened.
I had been in the SCA for a couple of months when I bought this book, and much to my delight, other people in Dun in Mara were interested in natural dyeing too! Aoife even offered to host a natural dyeing day at her house. We would all bring pre-mordanted yarn, and scraps of fabric, and dye stuffs to play around with and see what kinds of results we could get.
Since we would be mordanting fabric and yarn at home, and I did not want to buy a new kitchen pot exclusively for this one day experiment, I decided to try the soy-milk mordanting methods you can read about online. I used this tutorial: https://caitlynirwin.com/blog/how-to-make-a-soy-milk-mordant . Looking back, I should have just bought a second-hand pot and committed to what was clearly about to become a new obsession hobby.
Using soy-milk to pre-treat fabric and yarn is a long, smelly process that, in my limited experience, does not work well. I soaked my fibres in soy milk for a little over 24 hours, then took that milky fabric and yarn and hung it up to dry and cure for a WEEK. But, because this is Ireland, it was obviously raining and I couldn’t hang the fabric outside. Instead, I hung this milky fabric in my house, dripping tiny soy milk drops all over my floor for the next week. My cats were thrilled, but my house smelled exactly how you would expect after a week of leaving non-refrigerated milk out to air dry.
But, this was for science! I would not be deterred!
After the week of curing, I bagged the pre-treated textiles and took them and about one million onion skins (I bought several bags of onions and took the skins off them, storing the rest, naked, in my fridge… it did not help with the smell in my house) with me to Aoife’s house for our day of dye experiments!
We had a gorgeous day. Aoife prepared vats of cochineal, weld, and madder which we heated over the fire and dropped our fibres in to simmer outside. Inside, we cooked up a big vat of onion skin soup. We got to chatting and accidentally let this pot boil (several times) which the book expressly tells you not to do. But, we dropped our fibres into that pot too and waited to see what colours we would end up with.

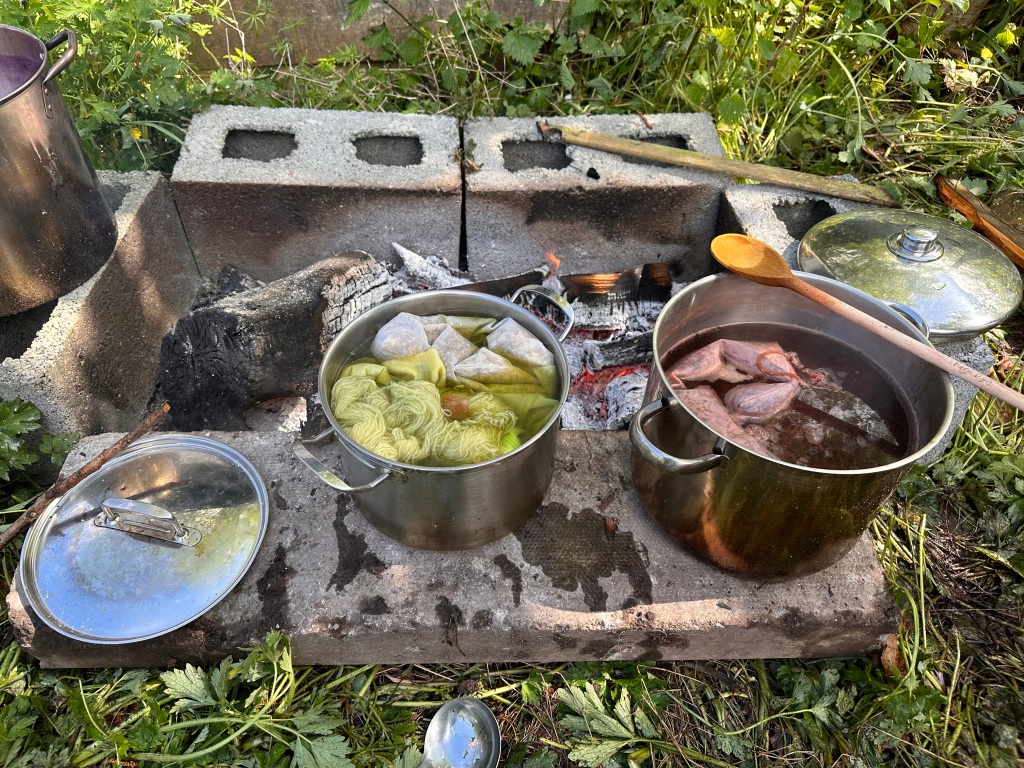
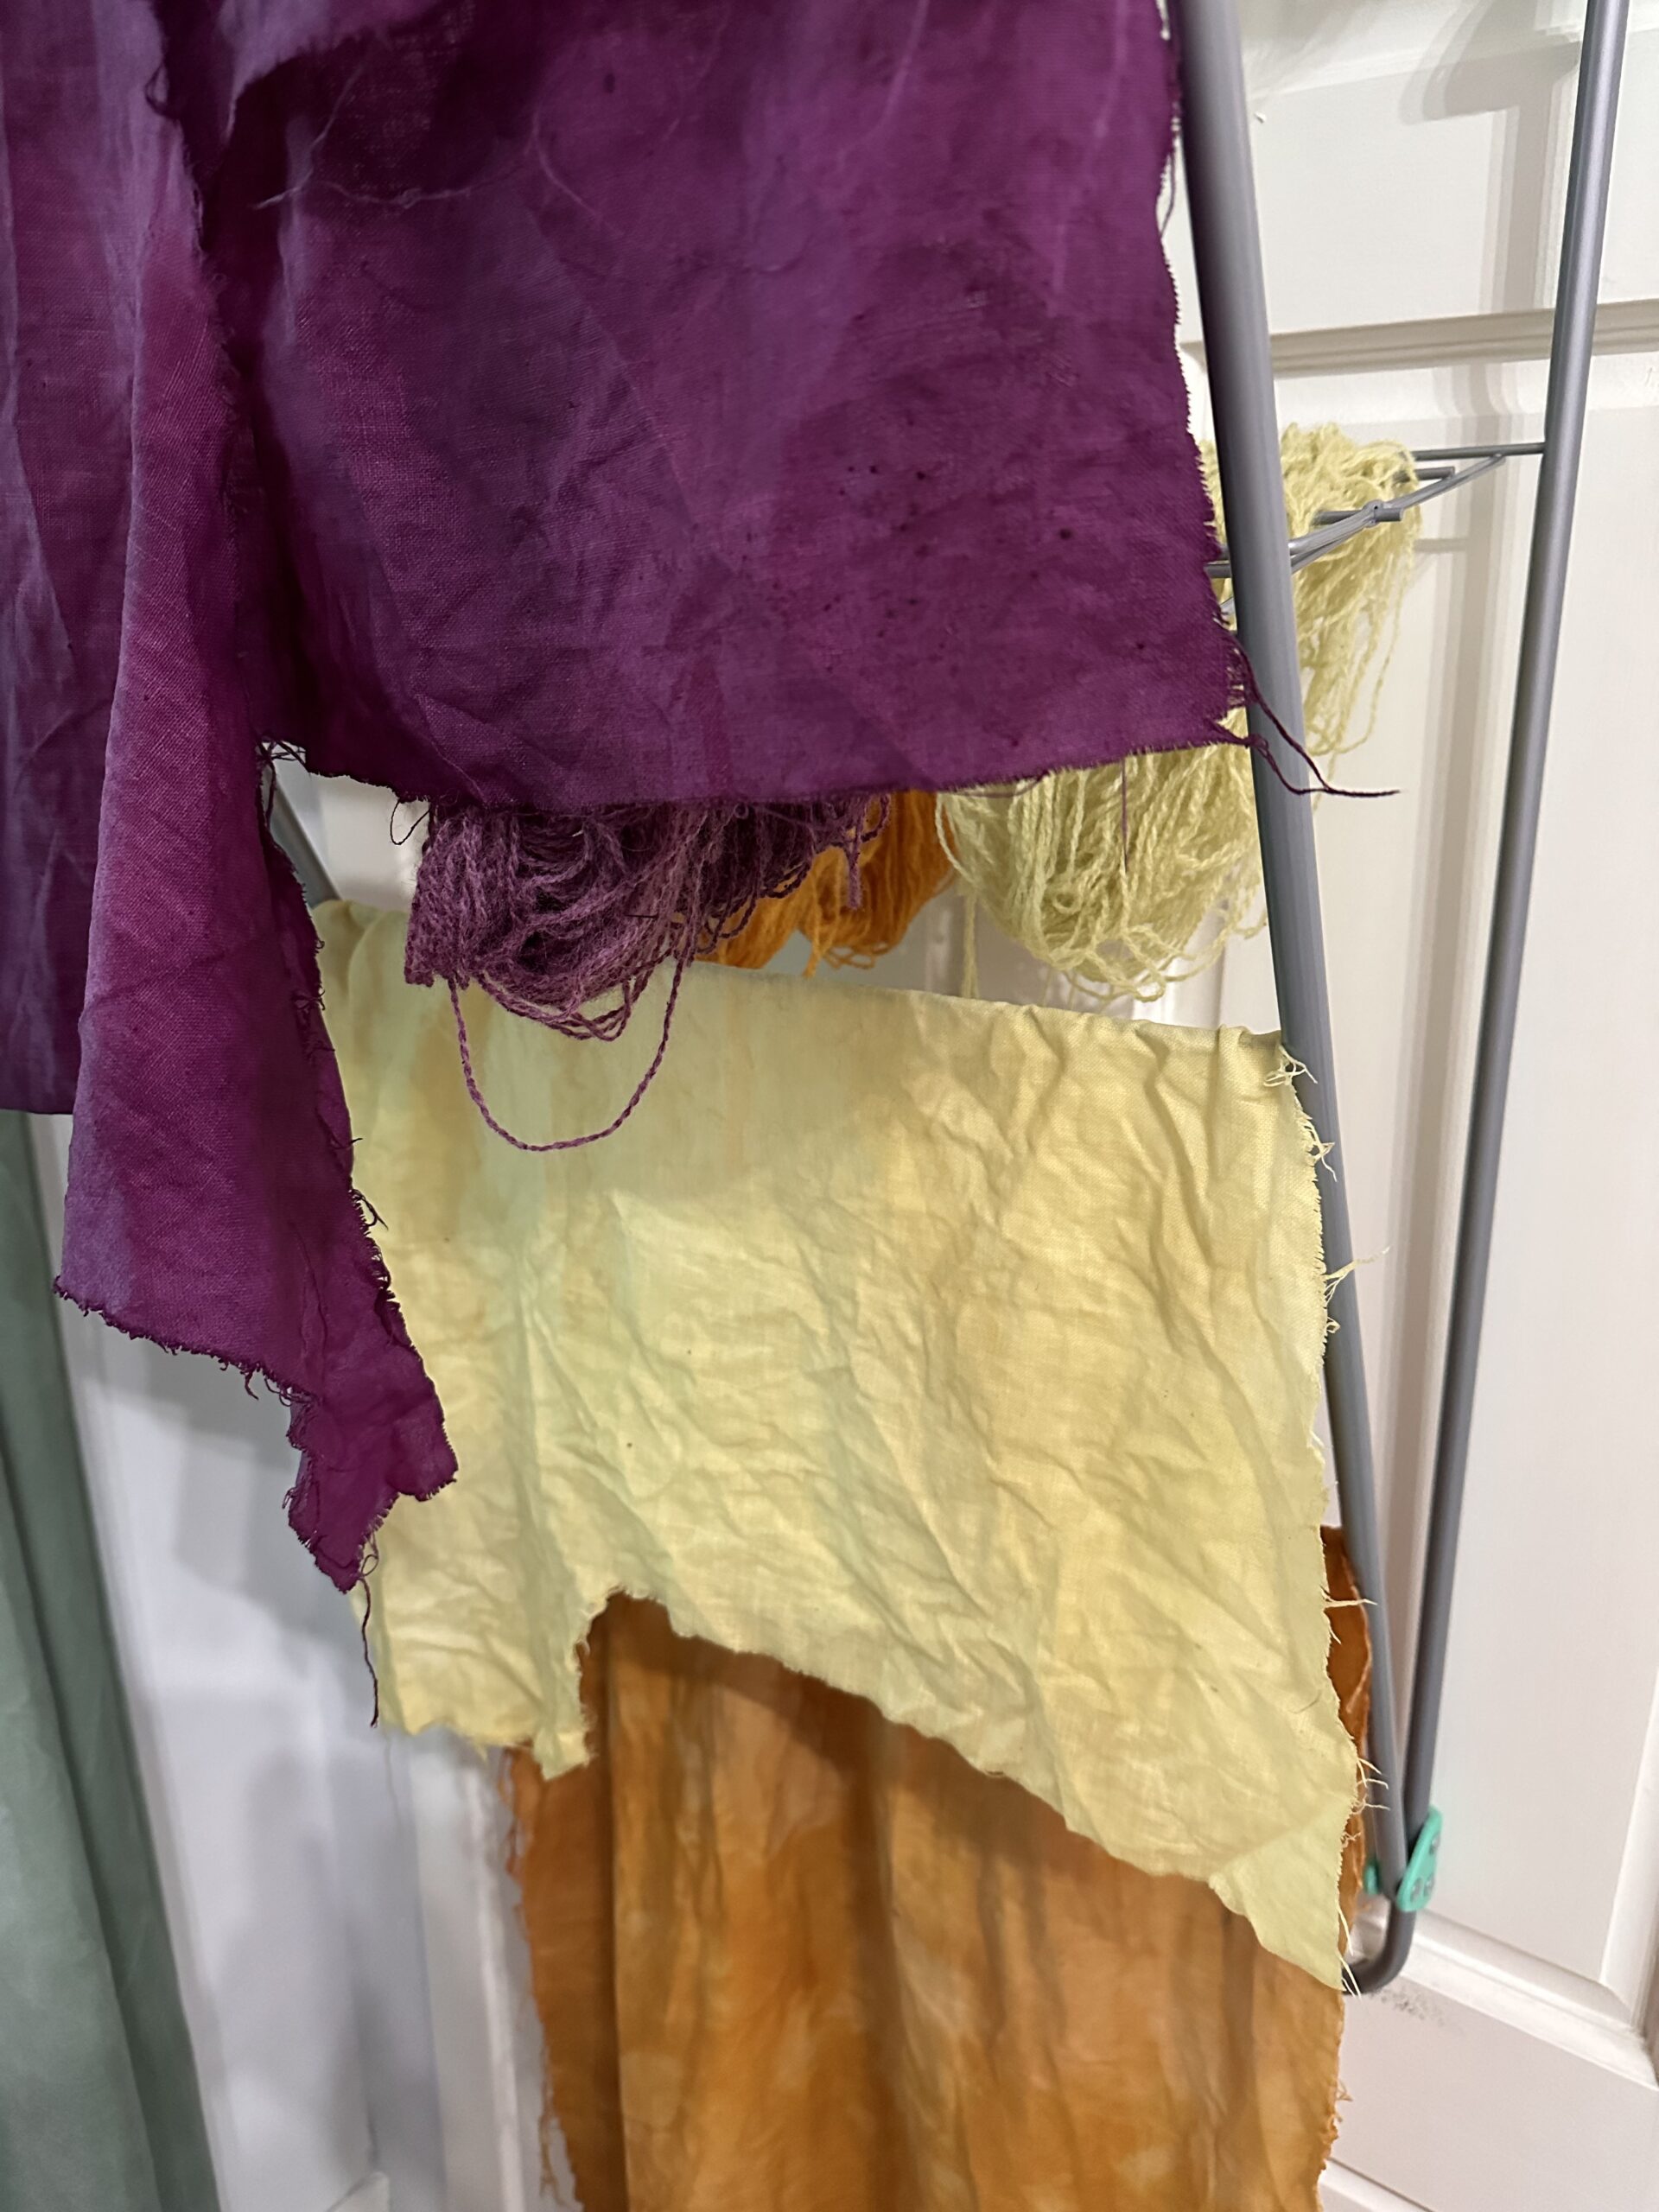
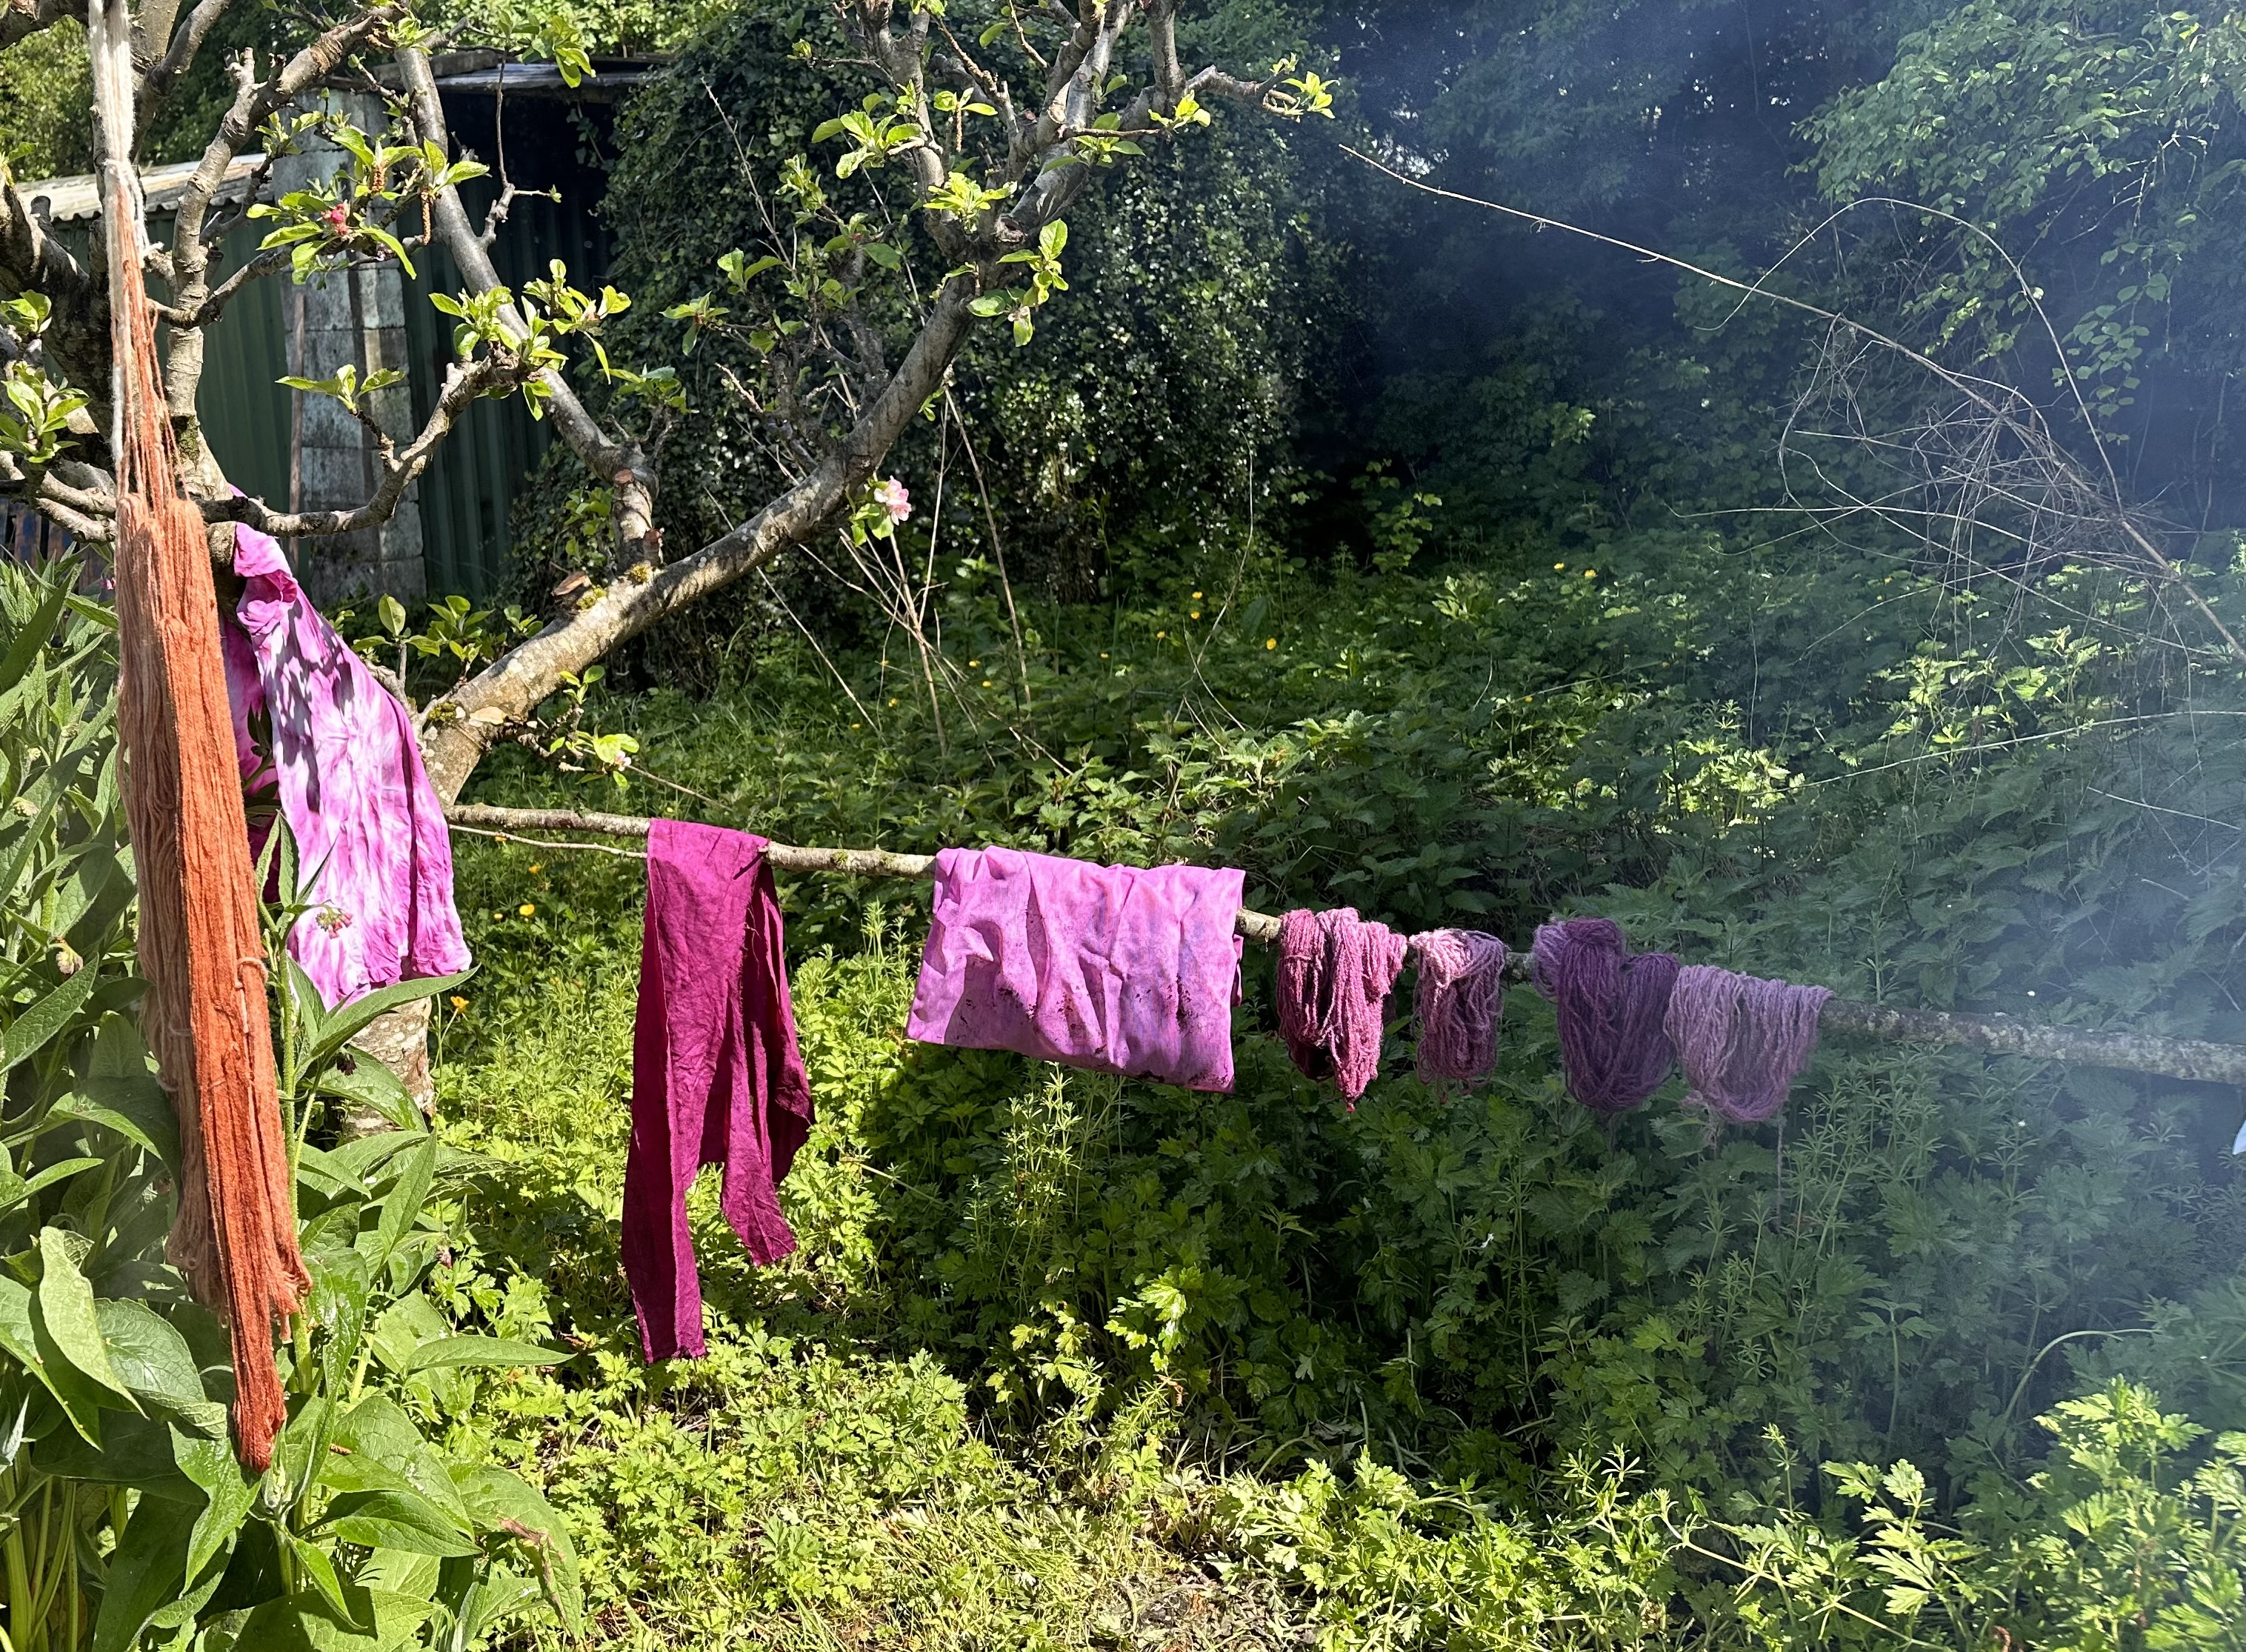
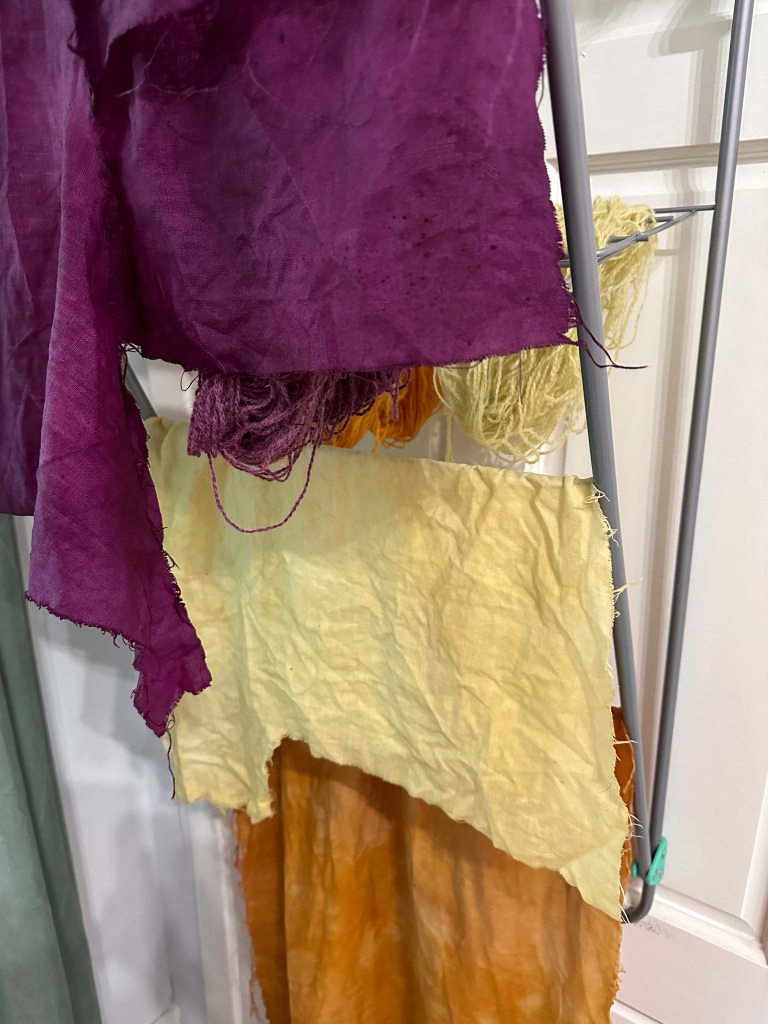
After a short time, we started extracting bits of scrap linen and tangled balls of yarn that were the most vibrant, wonderful colours. I had not expected anything so bright and dramatic! We got hot pink (cochineal), highlighter yellow (weld), and a rich brownish red (madder)! The pot of onion skins produced a beautiful mustard yellow that is my favourite colour, so I couldn’t have been more pleased!
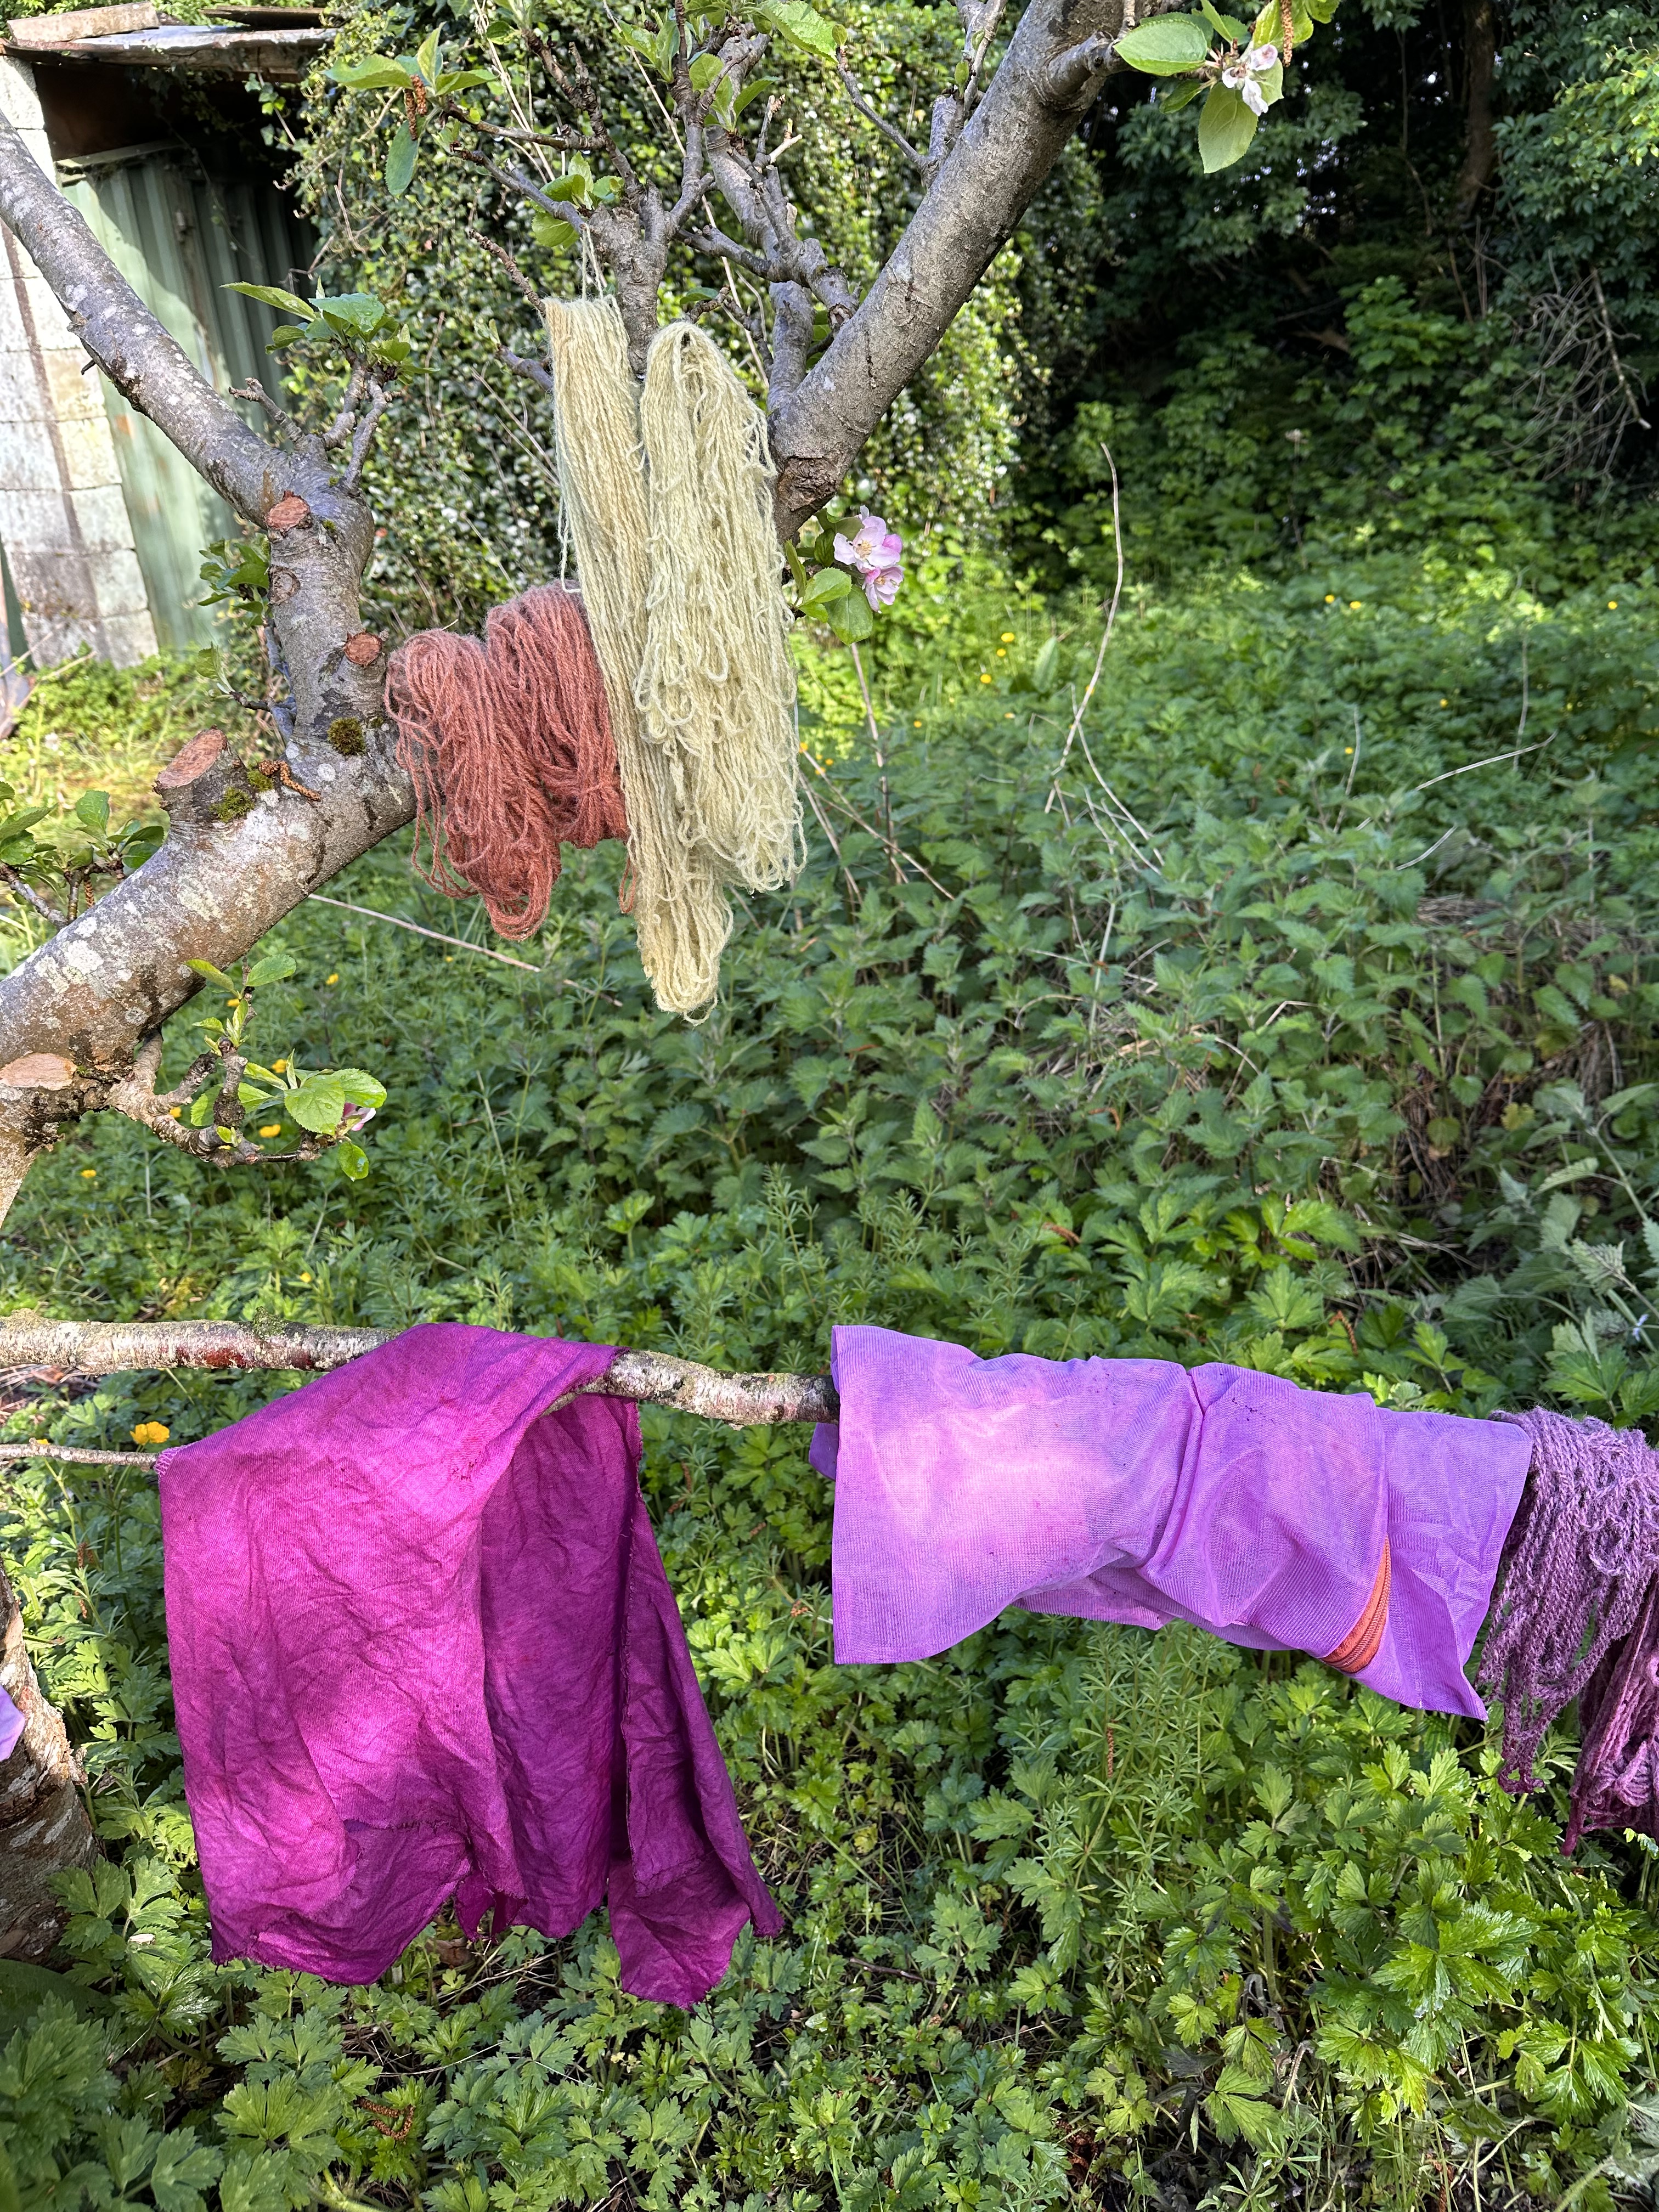
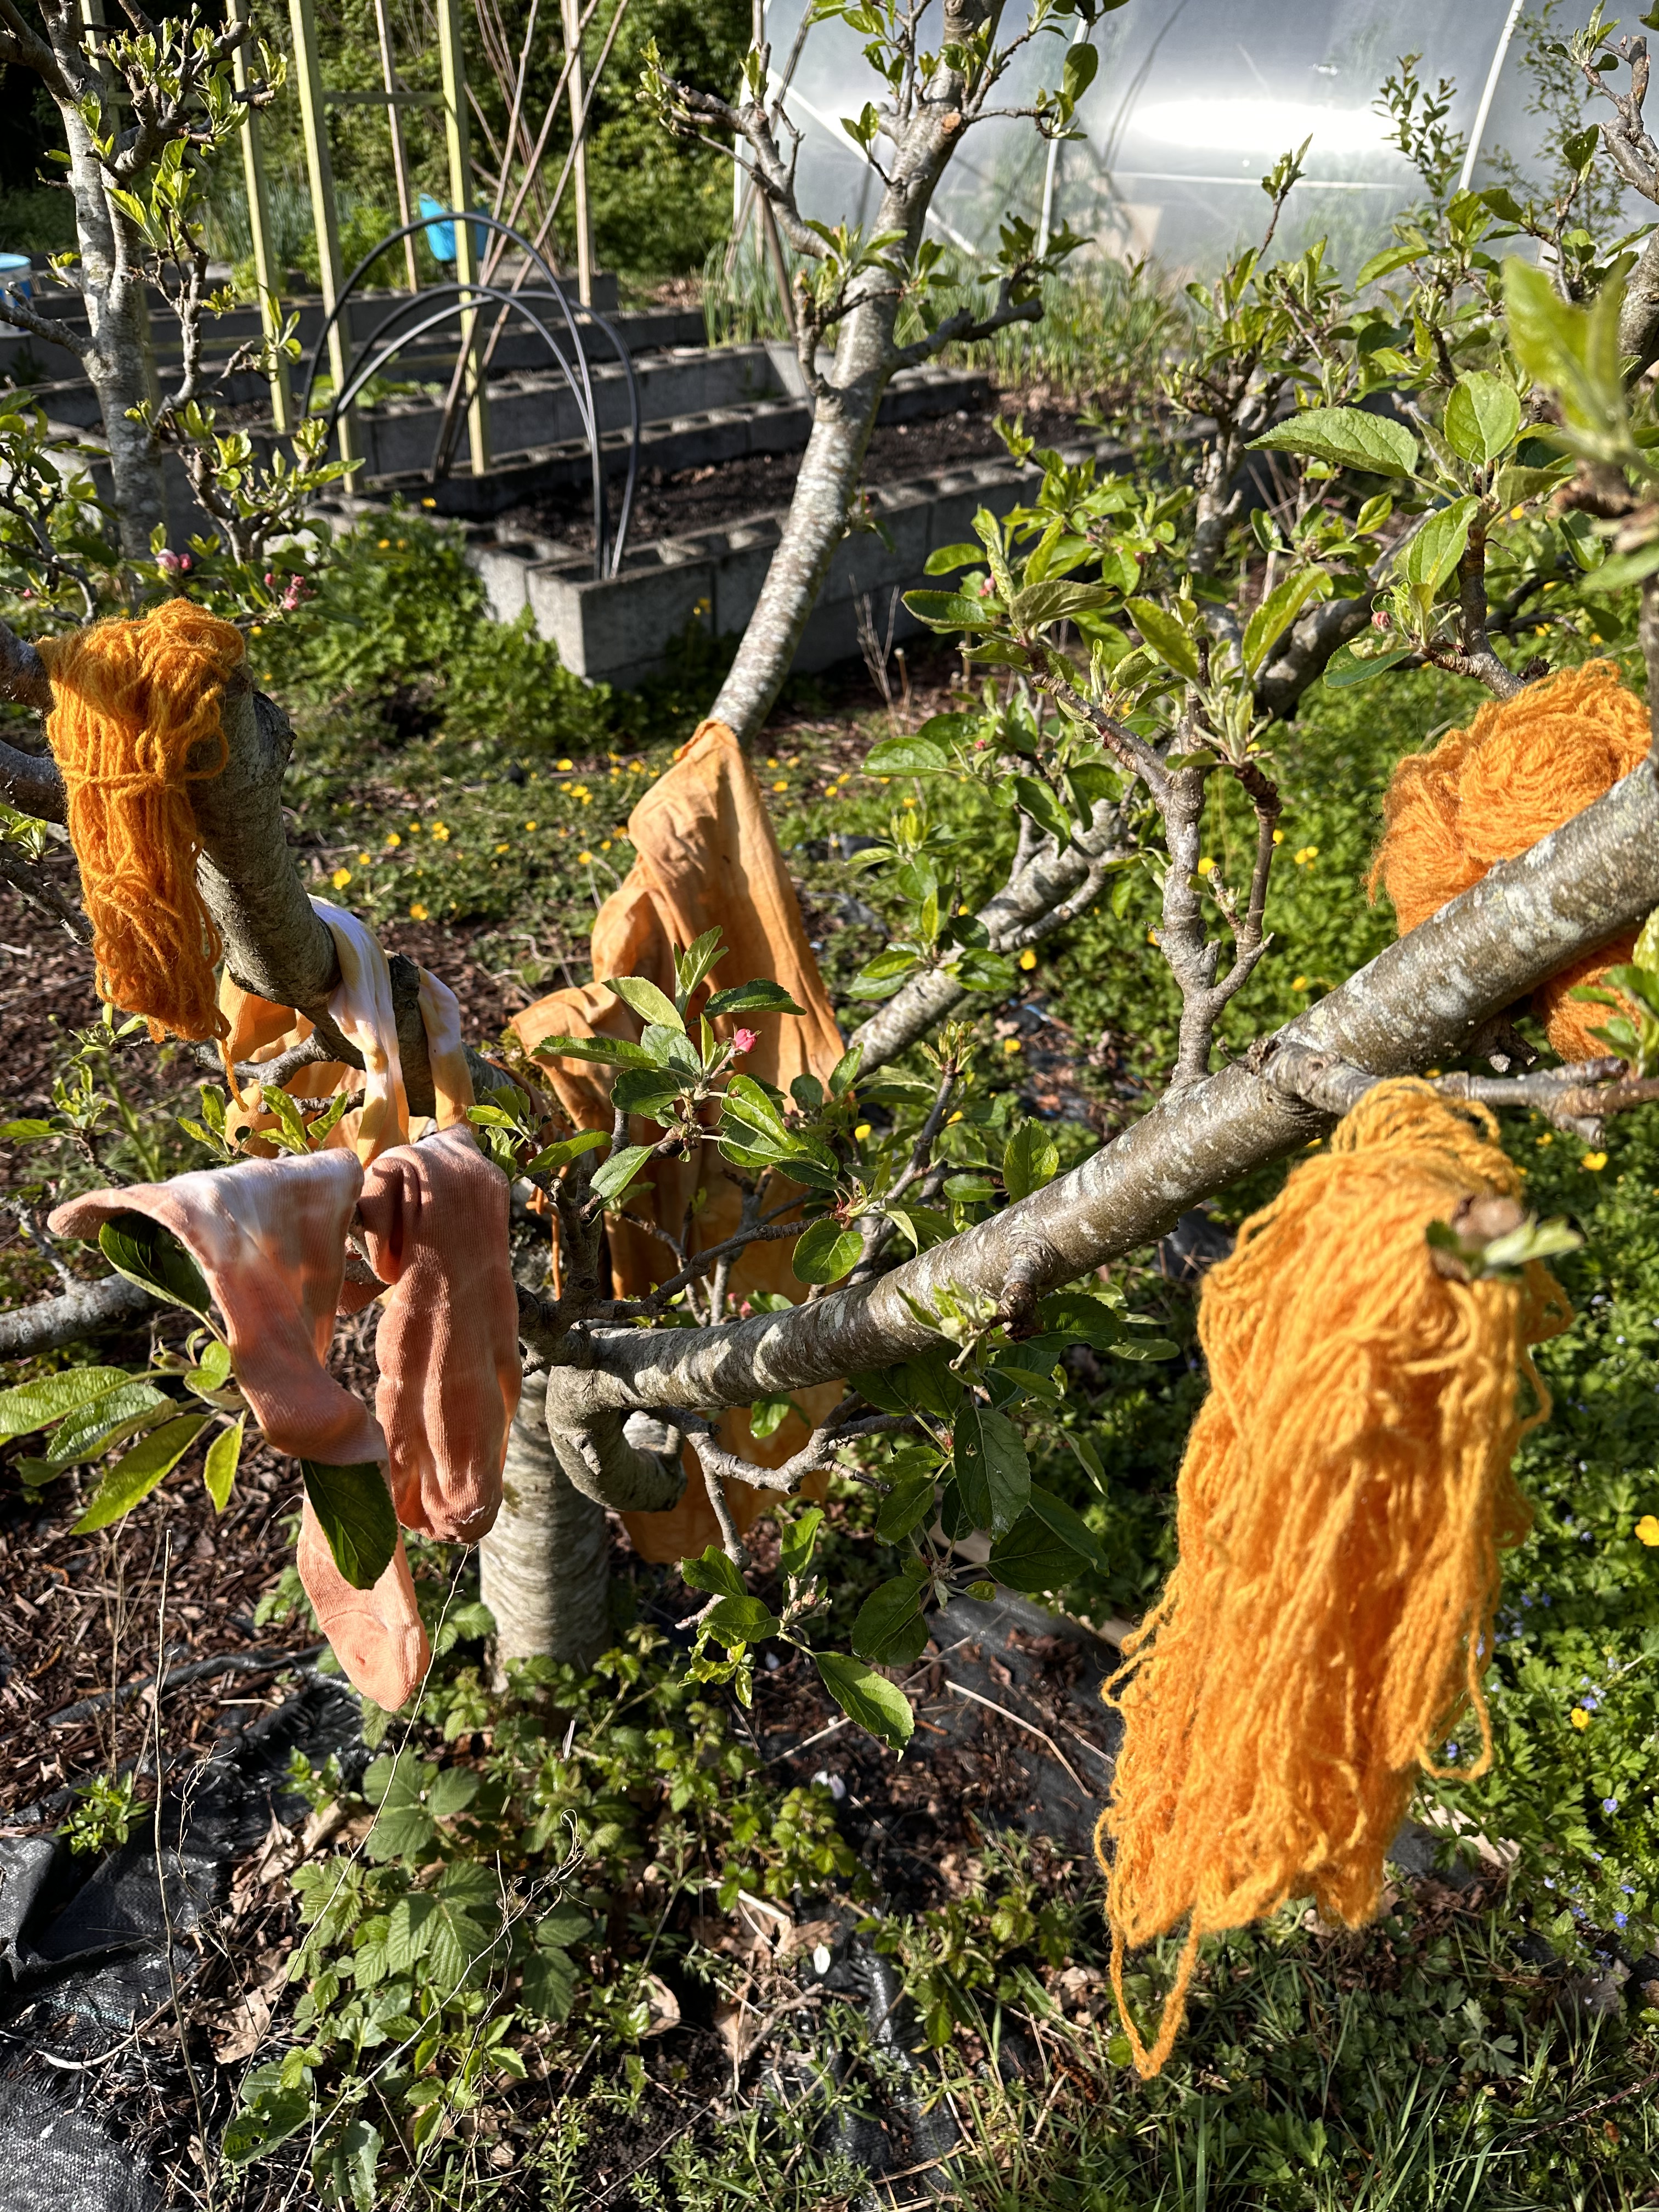
We did find that the fabric that had been in the pot with the onion skins looked very splotchy, almost tie-dyed, and now that I have learned a little more about the dye process, I know we should have strained the skins out of the pot before adding the textiles. The places where the fabric and yarn sat directly on the onion skins were dyed a darker shade.
I took my wool yarn and linen fabric scraps home and let them drip dry (in the house again) for a few days until they were completely dry. After that, I carefully rinsed them until all the excess dye was rinsed out and the rinse water was clear, and then I let them dry again. I was SHOCKED by how much lighter the colours were on my linen fabric after all the rinsing and drying was done. I have a sneaking suspicion that much of my soy milk treatment simply rinsed away, taking the adhered dye with it. The wool yarns that had been alum mordanted by Nadja kept their colours really well.

I was still happy with the colours in the end though. It was a great experiment, and enough fun to get me really, properly hooked on natural dyeing, and trying to be a little bit more experimental and relaxed in my process. I’ve used the linen that I dyed in the onion skins vat to make napkins for my feast gear and a lining for a pilgrim bag (scrip) for my garb. The napkins have faded to a pale, dull beige in the months since they were dyed. I now realise that something that is so heavily used, and so often washed is not the best place for dye colours to last. It makes sense that, historically, table linens were white, and could be easily scoured and then bleached in the sun. I plan to over-dye my napkins at some point and see if a different mordant technique helps them keep their colour for longer.
The bag lining has kept its colour very well after the initial rinse! I haven’t needed to wash the bag since I made it, and since the linen is used only as the lining, it is protected from sunlight. It does retain a vaguely milky, oniony smell however. It’s not terrible, but it’s not altogether pleasant either. (I apparently have no photos of this bag, so you’ll have to take my word for it until I get a photo or two!)
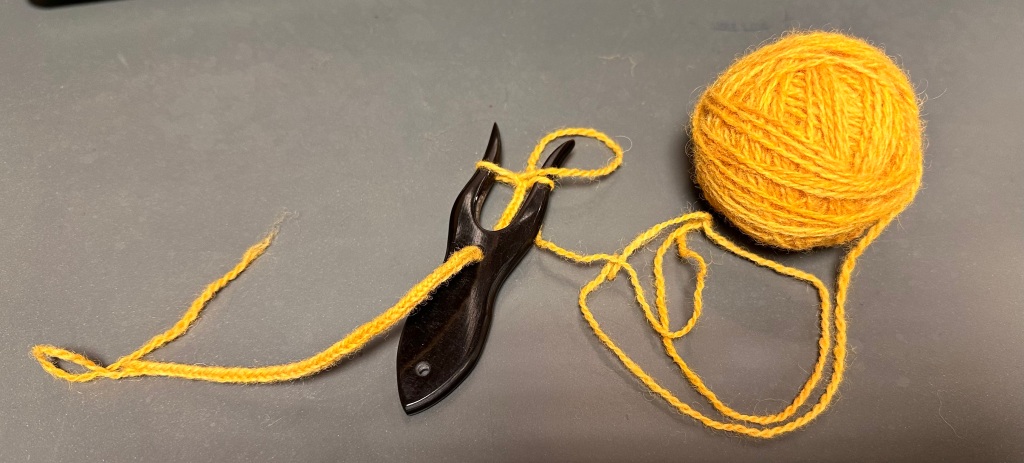
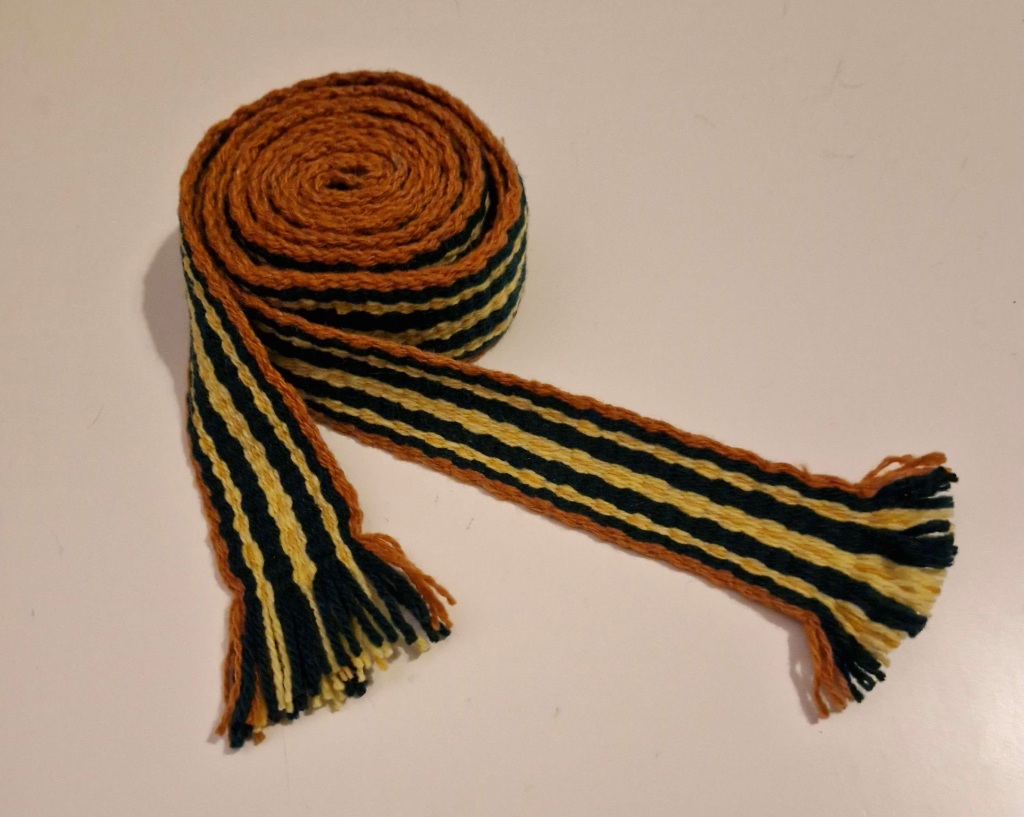
The yarn that I came home with has also been used to enhance my garb! I made lucet cords to secure the front of my kirtle, and Mallymkun just recently made me a tablet woven belt using some of the colours!
Since this day of experimentation, I have done a bit more playing around with natural dyeing. I’ve learned that I really do enjoy the process more if I weigh the fibres and dye stuffs, take notes, cut swatches, measure pH of the water, time the heating of the pots…
This process of natural dyeing is so vastly different from where I started with the packets of dye that you toss into a washing machine drum and let agitate for a while until you’re happy with the colour on the fabric. It’s much more fussy and complicated to use natural dyes, and it’s much harder to get a consistent, even result. But you are rewarded for all that hard work with beautiful, natural colours that reflect the landscape around you and all match each other beautifully.
Leave a Reply